Walk into almost any home renovation forum, scroll through enough before-and-after photos, and you’ll notice a pattern: kitchen islands are one of the most rewarding projects a homeowner can take on — and also one of the most frequently botched. The appeal is obvious. A well-designed island adds workspace, storage, seating, and a visual anchor to the entire kitchen. But the gap between a Pinterest-worthy island and a disappointing, awkward structure that gets in everyone’s way comes down to the decisions made before a single board is cut or a single screw is driven.
When it comes to creating the perfect kitchen island, there are several mistakes that DIY enthusiasts often make. By understanding these kitchen island mistakes to avoid and learning how to sidestep them, you can ensure a successful project that enhances both the functionality and aesthetics of your space. Let’s explore some of the most common pitfalls and how to steer clear of them.
Why Kitchen Island Planning Matters More Than Most People Think
Proper planning is crucial when it comes to creating a functional and stylish kitchen island. Avoid DIY kitchen island common mistakes and kitchen island planning errors such as not considering the workflow, neglecting adequate storage, or overlooking the size and scale of the island. By paying attention to these key factors, you can ensure that your kitchen island not only looks great but also serves its intended purpose effectively.
Here’s something most first-timers don’t fully grasp until it’s too late: planning a kitchen island isn’t just about measurements. It’s about understanding how people actually move through a kitchen. Think about your morning routine — coffee maker on the counter, toast popping up, someone reaching for a pan. Now imagine a big wooden structure sitting directly in the path of all of that. Suddenly, the dream island becomes an obstacle course.
The planning stage should account for the kitchen work triangle — the invisible path between the refrigerator, the stove, and the sink. A well-placed island complements this triangle without cutting through it. Many DIYers skip this step entirely, assuming that “somewhere in the middle” is good enough. It rarely is. Spend real time watching how your household uses the kitchen before you commit to any dimensions or placement. Walk the space. Map out where people stand, where they reach, where they tend to congregate. That real-world observation is worth more than any design template.
Another planning mistake is underestimating the need for clearance on all sides. The standard recommendation is at least 42 inches of walking space around an island — bumping up to 48 inches if multiple people frequently cook together. It might feel like a lot, but the moment two people try to open cabinet doors while a third person is trying to squeeze past the island, you’ll understand exactly why that number exists.
Electrical and plumbing considerations also belong in the planning phase, not as afterthoughts. If you want a prep sink or a built-in cooktop on your island, those require permits, licensed work, and significant planning ahead. Skipping that step and then trying to retrofit it later costs far more — both in money and frustration — than getting it right from the start.
Key Design Factors to Consider Before Building a Kitchen Island
Before embarking on your kitchen island project, take into account factors such as the layout of your kitchen, the traffic flow, and the desired functionality of the island. Make sure to avoid common kitchen island design mistakes by carefully thinking through every element before picking up a tool.
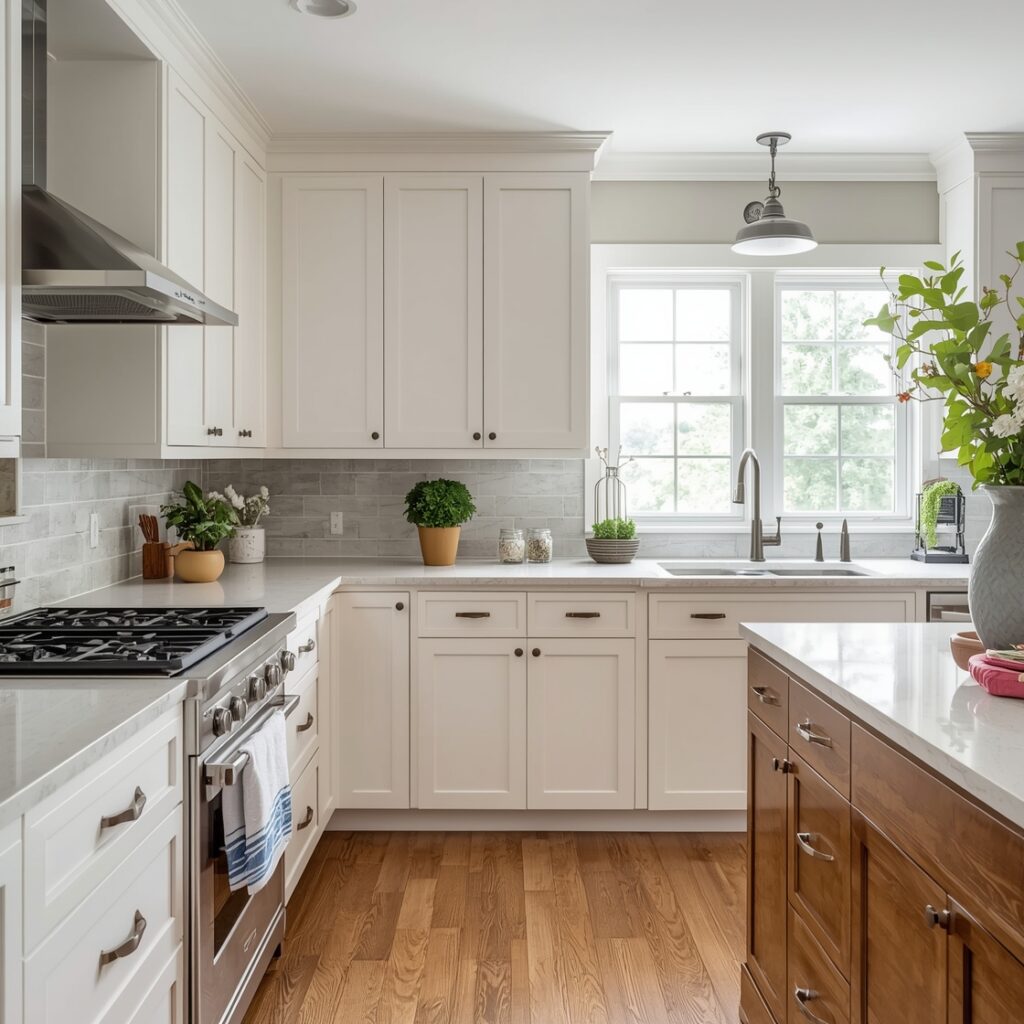
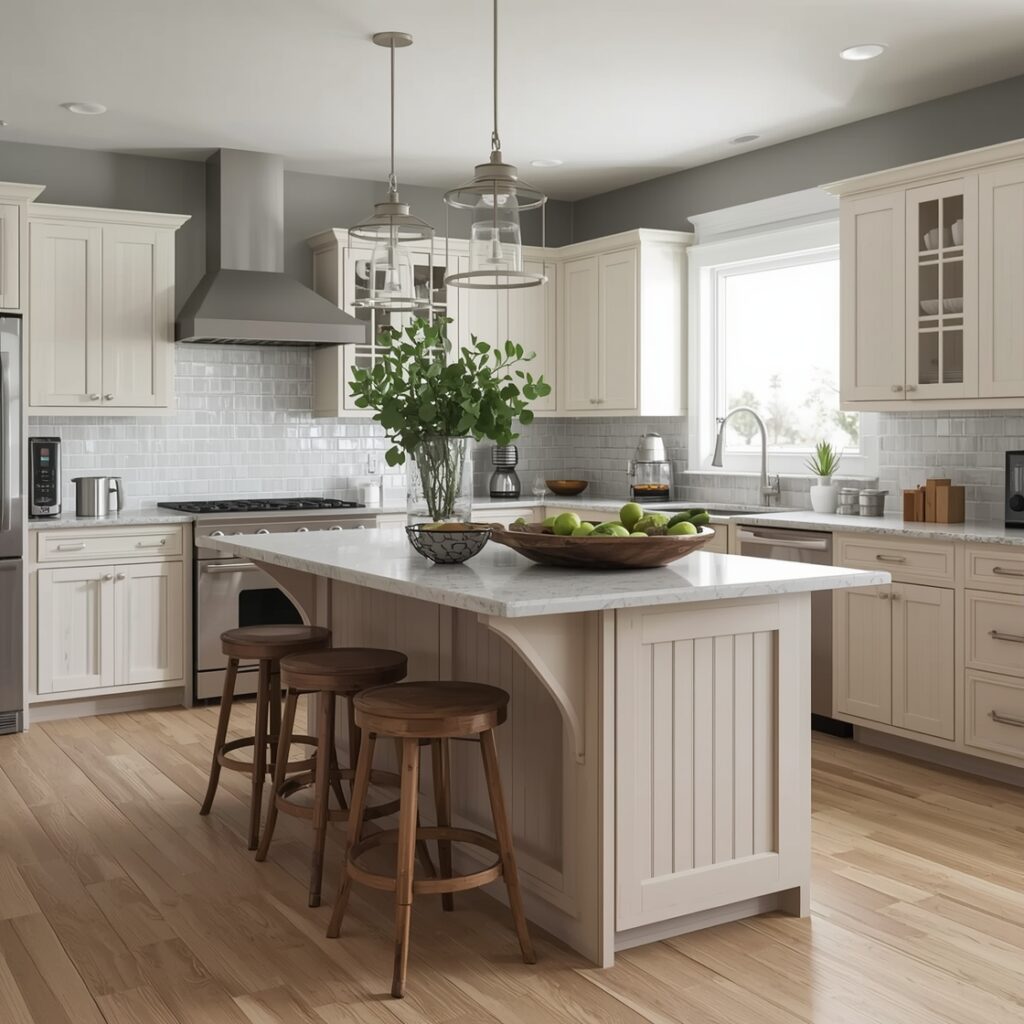
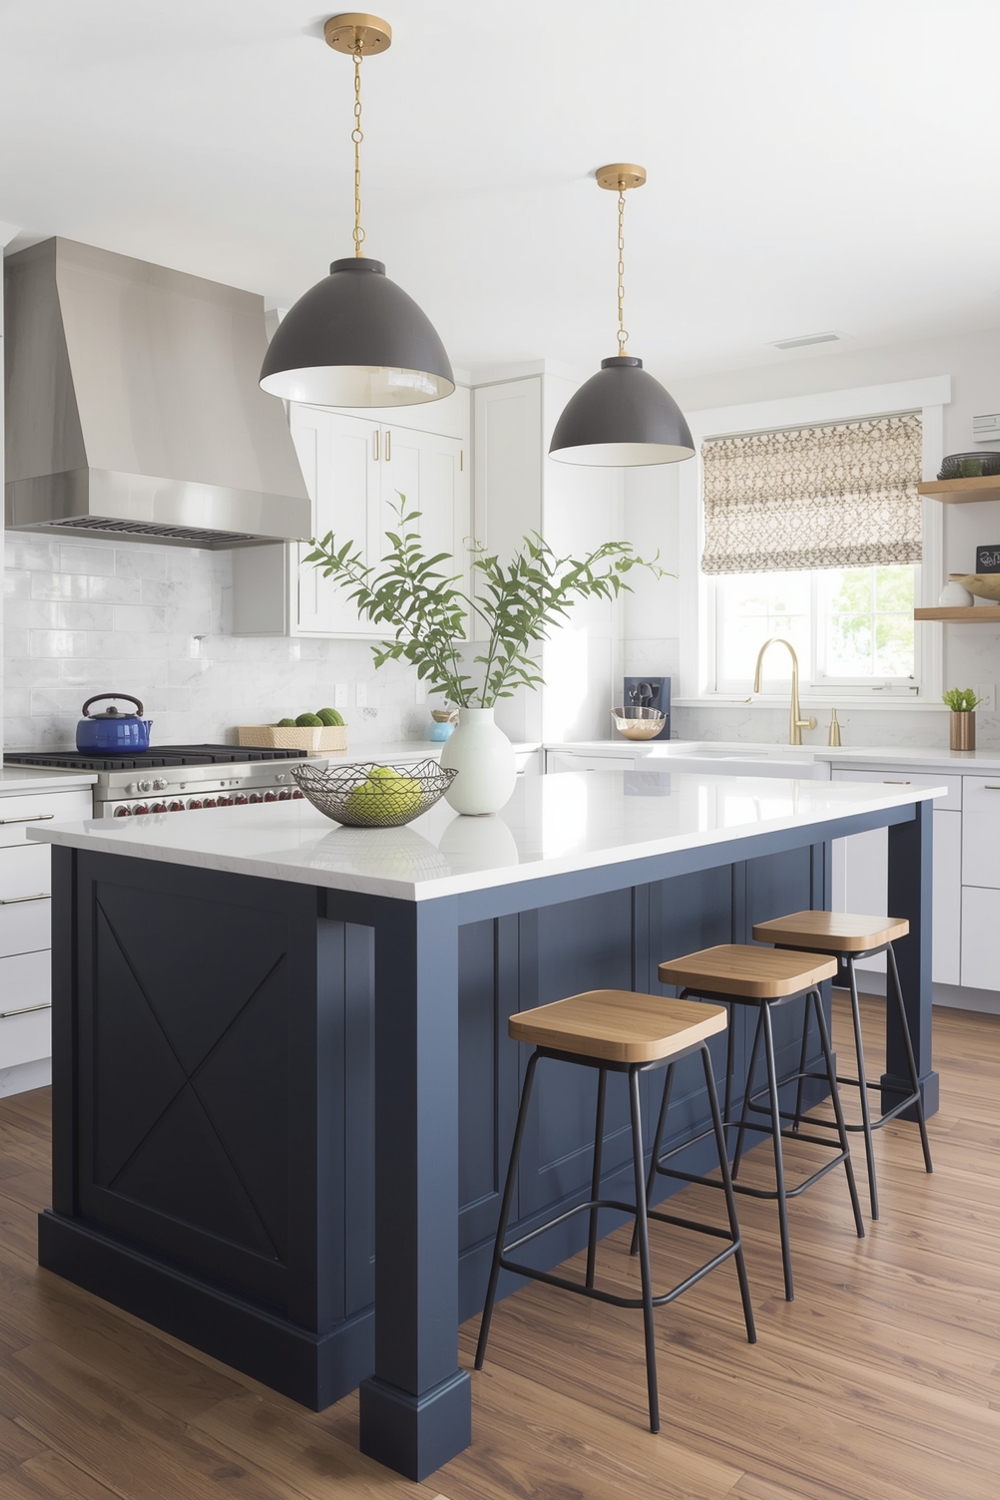
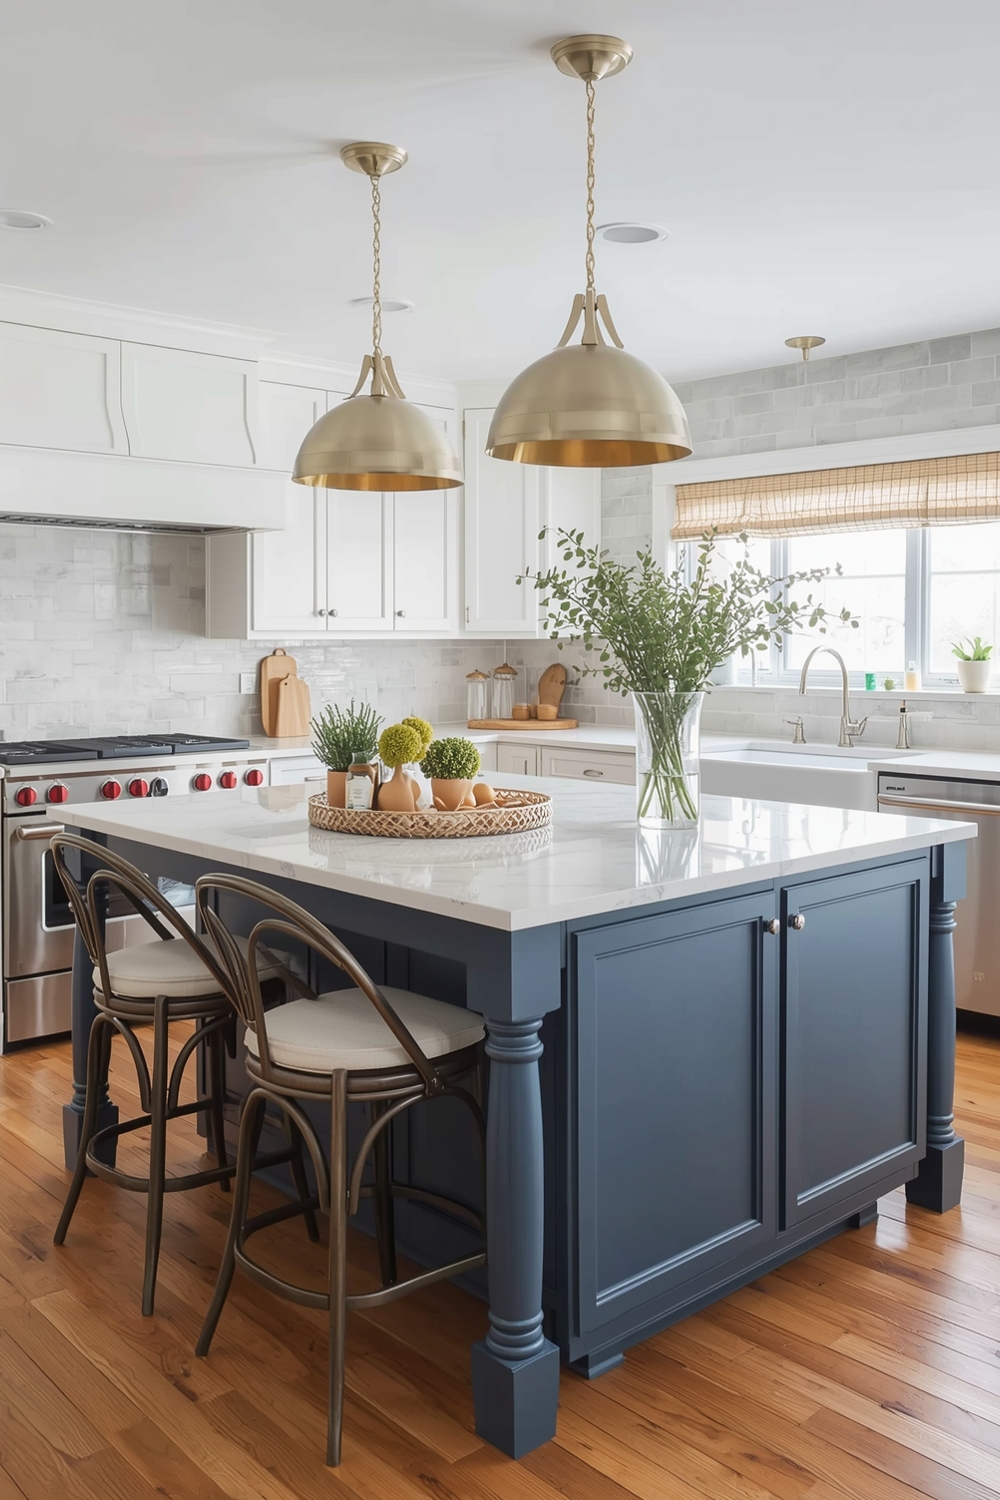
The first design factor to nail down is purpose. Sounds basic, but you’d be surprised how many people begin building before they’ve truly answered the question: what is this island actually for? Is it primarily for food prep? For extra storage? For casual dining with bar stools? For a combination of all three? The answer shapes every single decision that follows — the height, the depth, the overhang, the storage configuration, and the surface material.
A standard kitchen counter height sits at 36 inches, which works great for prep work. But if you’re planning to add seating, you have two paths: keep the surface at 36 inches and use standard dining chairs (which creates a comfortable, casual bar feel), or raise the surface to 42 inches and use bar stools for a more elevated look. Many DIYers mix up these heights or choose one without accounting for the seating they intend to pair with it, ending up with stools that are too short or diners hunching awkwardly over their plates.
Overhang is another detail that trips people up. If you want stools to tuck comfortably under the island, you need a countertop overhang of at least 12 inches — and ideally closer to 15 inches for comfortable legroom. Too little overhang forces diners to sit at an awkward angle; too much can make the countertop structurally unstable unless it’s properly supported with corbels or brackets.
Material selection is one of the most visible design choices — and one of the most commonly regretted. Butcher block looks warm and inviting but requires regular maintenance and doesn’t hold up well in households with heavy water exposure near the sink. Granite and quartz are durable but heavy, which means the base structure needs to be built to support that weight. Laminate is budget-friendly and surprisingly durable, but it can look cheap if it’s not paired with quality cabinet finishes. Whatever you choose, be realistic about your household’s habits and maintenance willingness. A beautiful material that you won’t properly care for will age badly in a matter of years.
Storage design is where a lot of DIYers get either too ambitious or too minimal. It’s tempting to cram every possible storage solution into an island — deep drawers, pull-out shelves, a wine rack, trash and recycling bins, open shelving. But when you try to include everything, you often end up with none of it done well. Think about what storage you actually need based on how your kitchen functions. If you already have plenty of cabinet space, maybe the island doesn’t need to be a storage powerhouse — maybe it should prioritize seating or workspace instead.
Lighting is another design factor that gets overlooked until it’s almost too late to address it properly. Pendant lights over a kitchen island are enormously popular — and for good reason. They define the island visually, add warmth, and provide task lighting for prep work. But they need to be wired in before the island is finished, and they need to be positioned correctly. Pendants hung too high look disconnected; hung too low, they become head hazards. A general rule of thumb is to hang pendant lights so the bottom of the fixture sits 30 to 36 inches above the countertop surface.
One final design consideration that many people neglect is cohesion with the rest of the kitchen. An island doesn’t exist in isolation — it lives inside a larger visual space. That means the cabinet style, finish, and hardware should relate to the surrounding cabinetry, even if they’re not identical. A completely mismatched island can look like an afterthought rather than a considered design choice. If you want contrast — say, a dark island in a white kitchen — make it intentional and deliberate rather than accidental.
The Most Costly DIY Kitchen Island Mistakes — And How to Fix Them
Beyond planning and design, the construction phase itself introduces a fresh set of potential missteps. One of the most common is building an island that isn’t level. Even a minor unlevel surface becomes obvious the moment you set a glass of water on it, and over time it causes cabinet doors to swing open on their own, drawers to slide out unexpectedly, and countertops to sit unevenly. Always check for level at every stage of construction — base, frame, and countertop installation.
Structural integrity is another major concern. A kitchen island that wobbles even slightly is not just annoying — it’s potentially dangerous. The base needs to be properly secured to the floor. In many cases, this means using construction adhesive and screwing into the subfloor. Skipping this step to preserve the ability to “move the island later” is a false economy. A permanently anchored island is far safer and more functional than a freestanding one that shifts every time someone leans against it.
DIYers also commonly underestimate the time and budget required for a quality island build. A project that seems like a weekend job often stretches into three or four weekends once you account for drying times, material delivery, unexpected fixes, and finish work. Budget at least 20% more than your initial estimate — both in time and money — because something almost always comes up.
Finally, don’t overlook the finishing details. Raw edges, visible screw heads, unpainted surfaces, and mismatched hardware are the small things that separate a professional-looking result from an obviously amateur one. Take the time to fill nail holes, sand edges smooth, apply a consistent finish, and choose hardware that ties the whole piece together. Those final hours of finish work are what transform a functional structure into something you’re genuinely proud of every time you walk into your kitchen.
Final Thoughts: Building the Island You Actually Wanted
A kitchen island done right is one of the most satisfying home improvement achievements you can accomplish on your own. It’s visible every single day, it makes your kitchen more functional, and it adds real value to your home. But that outcome is only possible when you invest the proper time upfront — planning the space honestly, designing for your real lifestyle rather than an idealized version of it, and executing the build with care and attention to detail.
Avoid rushing the early decisions. Measure twice, plan thoroughly, and don’t let excitement push you into cutting corners. The homeowners who end up happiest with their kitchen islands aren’t necessarily the most skilled builders — they’re the ones who were patient enough to get the planning right before ever picking up a saw. Take that lesson to heart, and your island will be something you enjoy for decades, not something you’re looking to tear out and redo a few years down the line.